Adobe Photoshop
Photoshop is a raster graphics editor used for photo-editing and digital art.
Find below the resources for our Photoshop sessions.
Course objectives
- Create a Photoshop project
- Working with Layers – Selecting and Editing
- Export Results
Getting Started
- Click the Windows Icon/Start button in the bottom left corner
- Click Adobe Photoshop
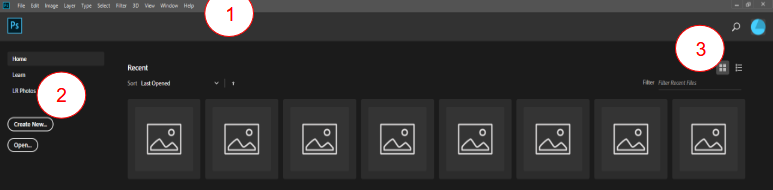
Home Screen
- Menu bar
- Navigation Pane
- Home: Recent Files
- Learn: Tutorials for using Photoshop
- View options – Thumbnails or List
Creating new documents
- In the Navigator pane click New File
- Click Web > Web Large in the New Document window
Note
Choosing Web Large is suitable for screen work and allows you to rescale to a smaller size if necessary. This is a good choice if you are creating an image for posting to websites.
- Change the Filename in the Preset Details pane e.g. Training
- Check the colour mode is RGB
- Accept all other default settings
- Click Create at the bottom of the New Document window screen
Some information on
File formats
There are three types of files in Photoshop:
- Original source material – Untouched files.
.jpgis the most common, as it is the default format on many mobile devices. RAW files are captured by digital cameras and some higher-end mobile devices. RAW file extensions vary depending on the manufacturer..dngis Adobe’s RAW format. - Working files – Layered and retouched files, usually saved as
.psd - Output files – Usually saved as
.jpgor.png
Bit Depth and Colour modes
Images are made up of individual pixels. A 6cm x 7cm image that is 1mb in size can have roughly 3 or 4 megapixels (3 or 4 million pixels).
- Bit Depth – the amount of information for each pixel in an image
- A bit depth of 1 gives a black and white image
- A bit depth of 8 allows each pixel to have up to 256 colours – perfect for web based images
- A bit depth of 16 allows each pixel to have up to 65536 colours – considered high colour – large file sizes but maintains higher quality during post production
The Main Screen
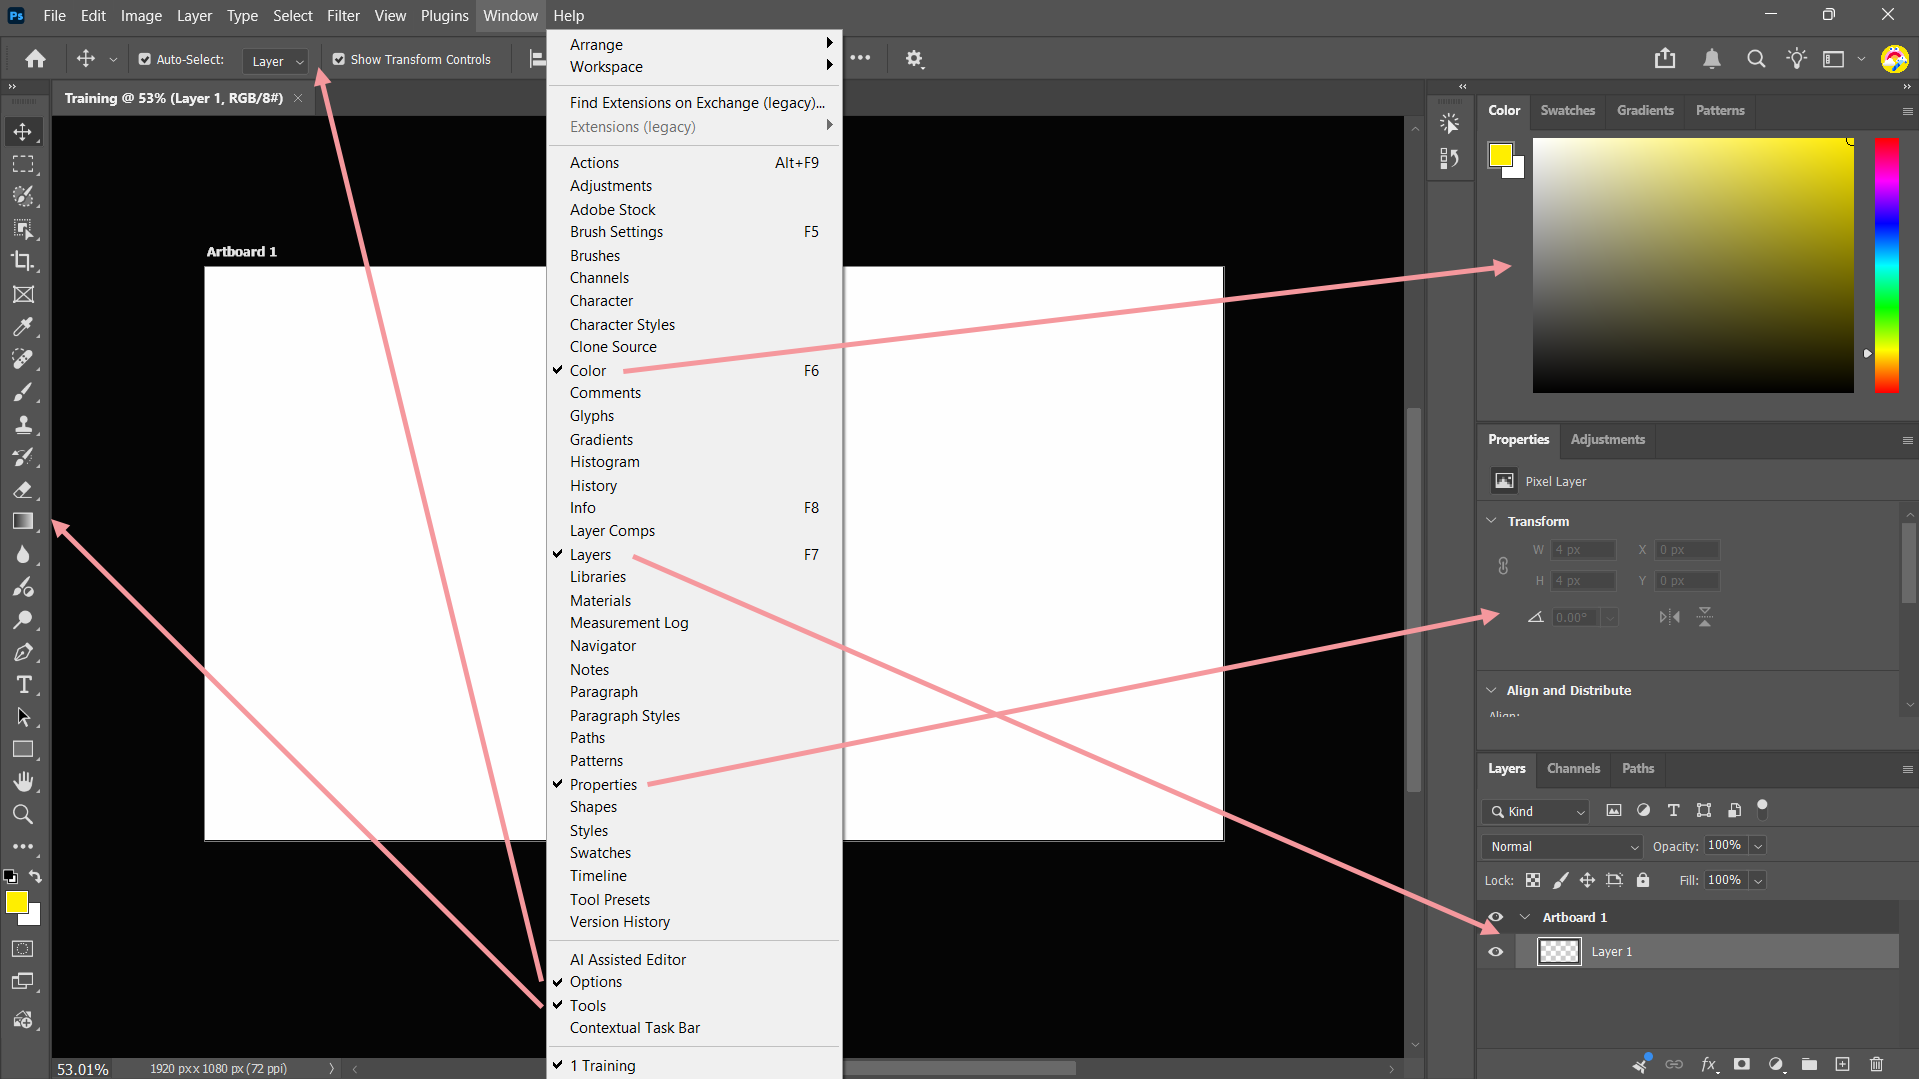
- The Main Screen opens with several panes or Tab Groups
- Click Control button (Top Right Corner) to see Tab Group options e.g Color Tab Group > Control button > Color Wheel
- Click Close Tab Group if the Panel is not required e.g Properties Tab Group > Control button > Close Tab Group
- Click Window menu
- Select Properties (This will reopen the Properties Tab Group Panel)
- Hover over a tool on the Tools bar to see a Rich Tooltip which is short animated graphic of the tool
If you do not wish to see Rich Tooltips…
- Select Edit > Preferences > Tools
- Clear Show Rich Tooltips
- Selecting a tool activates the Options bar at the top of the screen
- Select the Quick Selection tool (The options bar at the top changes to Quick Selection Options)
- Use Search to locate help on all things photoshop
- Click Magnifying glass (top right) or Ctrl + F